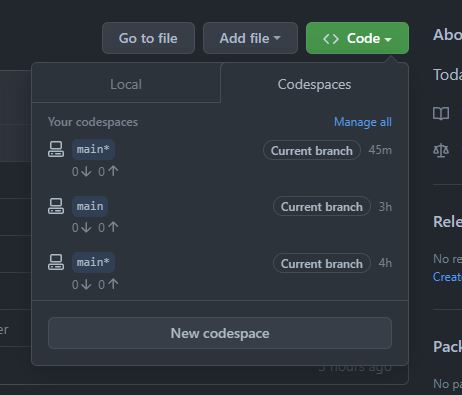
GitHub Codespaces offers a completely browser-based IDE experience. Based on Visual Studio Code, the IDE provides you with a full-fledged editor, a virtual machine to run your code on, and even tunneled network connections so you can test directly in your browser. Firing up a Codespaces session is as simple as clicking on the “New codespace” button from the “Code” dropdown in your repo.
Out of the box, launching a Codespaces environment will give you a little 4 core machine with 8GB of RAM and 32GB of storage. More than enough for doing basic web development. However, the image that its running won’t have all of the software we need in order to develop for our Jekyll site. Rather than installing the software each time we fire up a new Codespace, wouldn’t it be great if we could define it all in a Docerkfile and have GitHub use THAT when launching a site? That’s exactly what we’re going to do in this tutorial.
Let’s get this party started. 🥳
Step 0
Fire up a Codespace in your repo.
Setup Dev Container
A great feature of Codespaces is the “dev containers” functionality.
When launching a Codespace, GitHub checks the root of your repo for a .devcontainer directory. If present, it will use information stored there for the initial build out of our virtual machine image.
Microsoft has an entire repo dedicated to pre-build .devcontainer configurations, based on your project type. Lucky for us, there is one
that already exists for Jekyll.
Inside of your Codespace terminal, clone the dev-container repo:
@zimventures ➜ /workspaces/TIL (main ✗) $ git clone https://github.com/microsoft/vscode-dev-containers
Move the .devcontainer directory for the Jekyll project type into the root of your repo.
In this example, I’m already in the repo root so I’ll just move it to ./
@zimventures ➜ /workspaces/TIL (main ✗) $ mv vscode-dev-containers/containers/jekyll/.devcontainer/ ./
Taking a peek at the contents of the .devcontainer/base.Dockerfile there is one entry of particular interest to us:
# Install bundler, latest jekyll, and github-pages for older jekyll
RUN gem install bundler jekyll github-pages
Fantastic! When the Codespace is fired up, we’ll already have some basics up and running.
Additionally, in the .devcontainer/post-create.sh script, there is this little bit of logic:
# If there's a Gemfile, then run `bundle install`
# It's assumed that the Gemfile will install Jekyll too
if [ -f Gemfile ]; then
    bundle install
fi
It sure would be nice if our gems were automatically installed for us. Let’s get to setting up our Gemfile.
Gemfile setup
Create a new file called Gemfile in the base of your repository.
@zimventures ➜ /workspaces/TIL (main ✗) $ touch Gemfile
Now let’s go ahead and add our required gems to the file, pinning versions that match what are currently supported on GitHub Pages. See the official dependency versions page for the most up to date pins. What gems do we need for development within our Codespace?
jekylljekyll-theme-midnight(replace this with whatever theme you’re going to work with)kramdown-parser-gfm(not installed by default, and needed by jekyll)
We’ll surely add more gems later, but that’s enough to get us started.
Here’s what the final version of our Gemfile will look like:
source "https://rubygems.org"

git_source(:github) { |repo_name| "https://github.com/#{repo_name}" }

gem "jekyll", "~> 3.9.0"
gem "jekyll-theme-hacker", "~> 0.2.0"
gem "kramdown-parser-gfm", "~> 1.1.0"
Placeholder Page
Before we check in all our files, let’s drop a placeholder landing page at the root of the repo. In Jekyll, pages can be written in Markdown and/or HTML.
We’ll create a new file, index.md (in the root of the repo) and populate it with the following:
---
title: Home
layout: default
---

# Welcome to Today, I Learned

TODO: Write this! 😅
.gitignore
Before checking in our new files, let’s take a moment to create a .gitignore file in the root of the repo. This file tells git to ignore any files or directories that match the specified entries. Jekyll automatically
creates directories and files during the process of building our site. We do not want those files to show up as potential candidates for a commit.
Here, we’ll ignore a couple of Jekyll generated directories as well as the gem lockfile (we’ll undo the lockfile later…).
_site/
.sass-cache
Gemfile.lock
Commit, clean, and restart
With all of our base files in place, we’ll go ahead and commit our changes, pushing them to main.
Since our current Codespace was created prior to our code being merged to main, we’ll need to destroy it and create a new one.
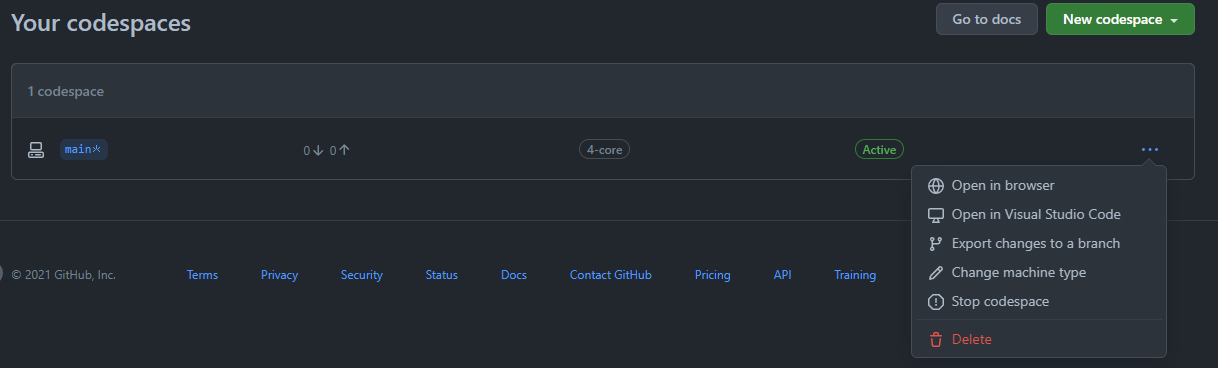
Simply close the Codespaces window, navigate back to your repo, and click the “manage” button in the list of code spaces.

In the list of Codespaces that’s shown, we’ll click on the menu button “…” and click “Delete”.
Disposable development environments…what a time to be alive. 😅
Restart
After the previous Codespace has been deleted, it’s time to fire up a new one. Follow the instructions as before to start one. You’ll note that this time will take a few minutes longer. GitHub is
building the Dockerfile that was specified by your .devcontainer and running the post build steps (installing our gems). Don’t worry though - this build process only happens on the initial spin up of the Codespace.
Going “live” (on our dev server)
Now it’s the moment of truth. Let’s see if we can serve the page from the newly spun up Codespace.
@zimventures ➜ /workspaces/TIL (main ✗) $ bundle exec jekyll serve
Configuration file: /workspaces/TIL/_config.yml
            Source: /workspaces/TIL
       Destination: /workspaces/TIL/_site
 Incremental build: disabled. Enable with --incremental
      Generating...
                    done in 0.506 seconds.
/usr/local/bundle/gems/pathutil-0.16.2/lib/pathutil.rb:502: warning: Using the last argument as keyword parameters is deprecated
 Auto-regeneration: enabled for '/workspaces/TIL'
    Server address: http://127.0.0.1:4000
  Server running... press ctrl-c to stop.
Cracking open our browser and pointing it to http://127.0.0.1:4000 we are presented with:
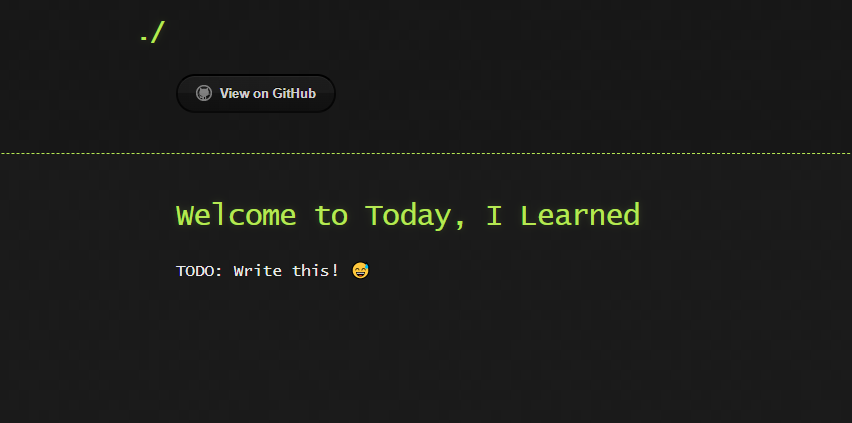
GREAT SUCCESS!
The page looks the same as it does when browsing the the URL that GitHub Pages gave us for the TIL site. We didn’t cover enabling GitHub pages in this tutorial but if you’ve already done so, your page should be live at the auto-generated URL for your site.
Happy Coding 💻
Next up: Theme Customization